Building Systems That Build Systems
Attain Total Cloud Deployment Automation with Azure, Ansible, & OpenBSD
Toby Betts
(Safely more than 6' away from) LinuxFest Northwest, 2020-04-24 through 2020-05-10
Disclaimer
- This presentation is for educational purposes only and does not contain any professional advice or recommendations and is not endorsed by the event organizer
- Use at your own risk, yes this means you
- Your actual mileage may vary
- Make verified backups before implementing any system or workflow changes
Difficulty Level
Technical:


4/5 multitools: We're getting into (a) BSD configuration, (b) Ansible, (c) ramdisk customization, (d) templates that call other, different templates, (e) wc(1)
Difficulty Level
Automation:


4/5 Robby the Robots: We're going to Automate All The Things

What This Talk is Not
- Kubernetes 101
- Arguing my OS/cloud is better than your OS/cloud
- Totally, completely non-applicable to AWS
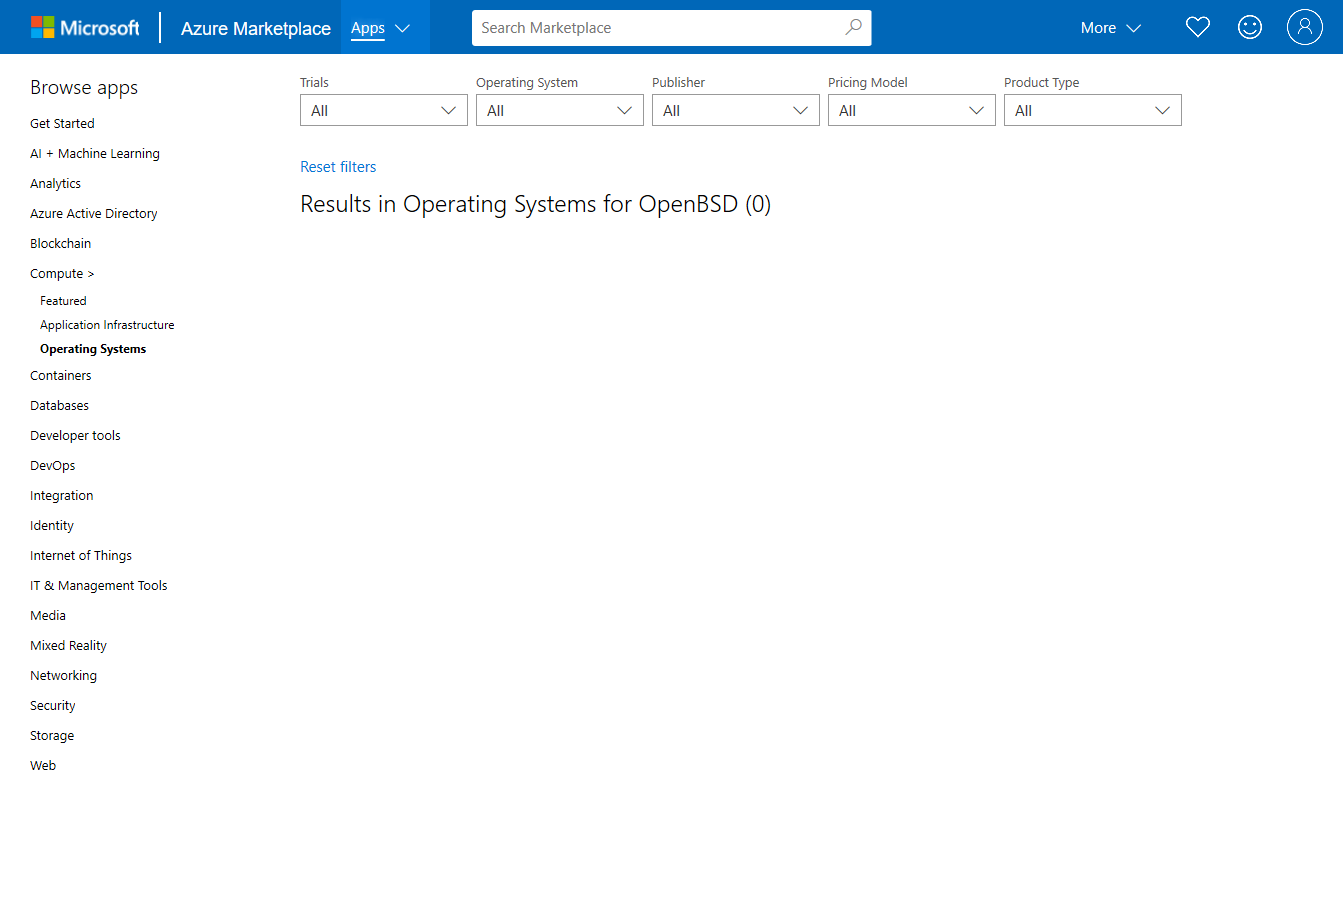
BSD/Linux on Azure Marketplace
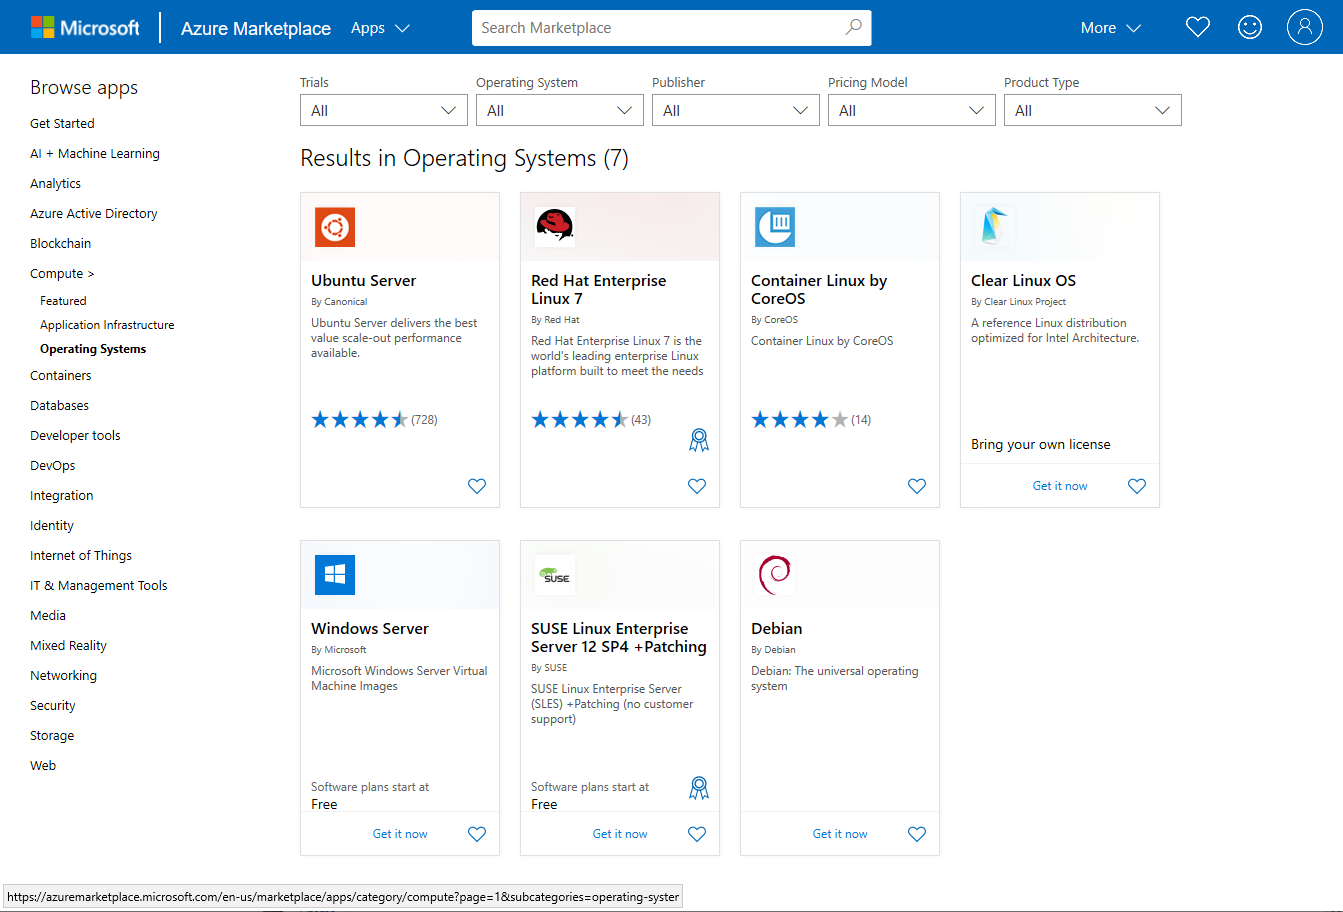
BSD/Linux on Azure Marketplace
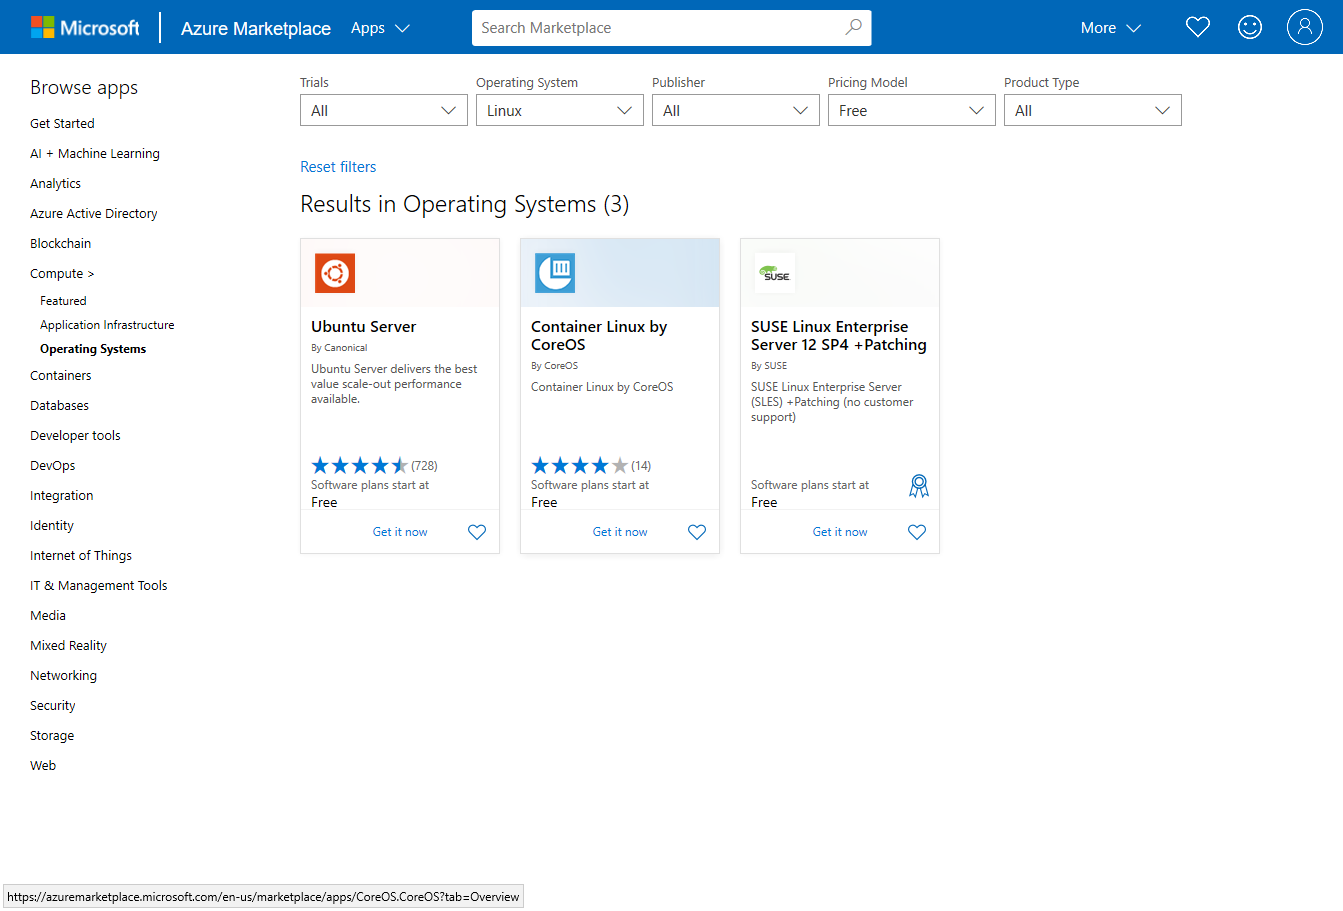
BSD/Linux on Azure Marketplace
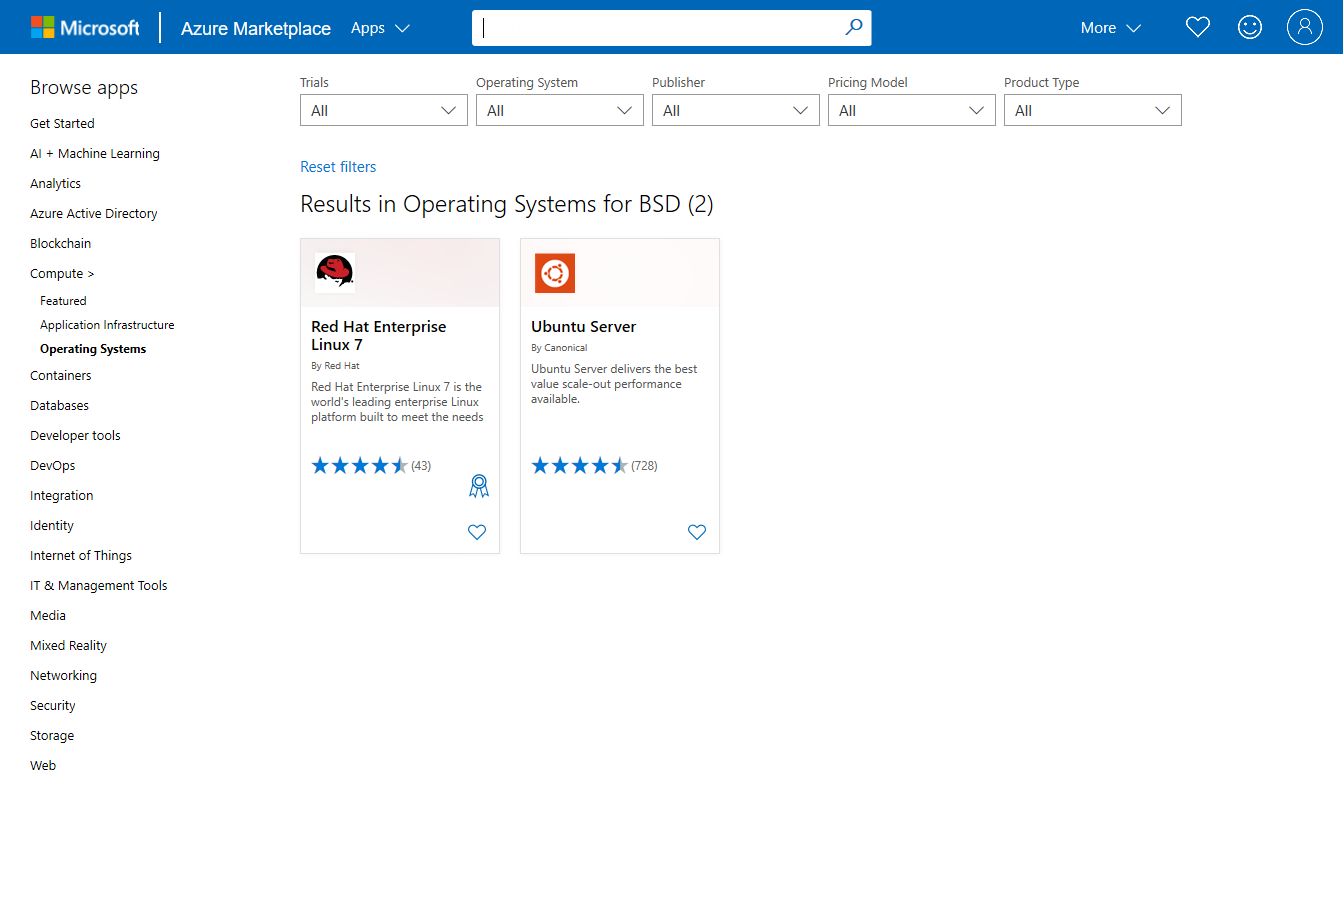
BSD/Linux on Azure Marketplace
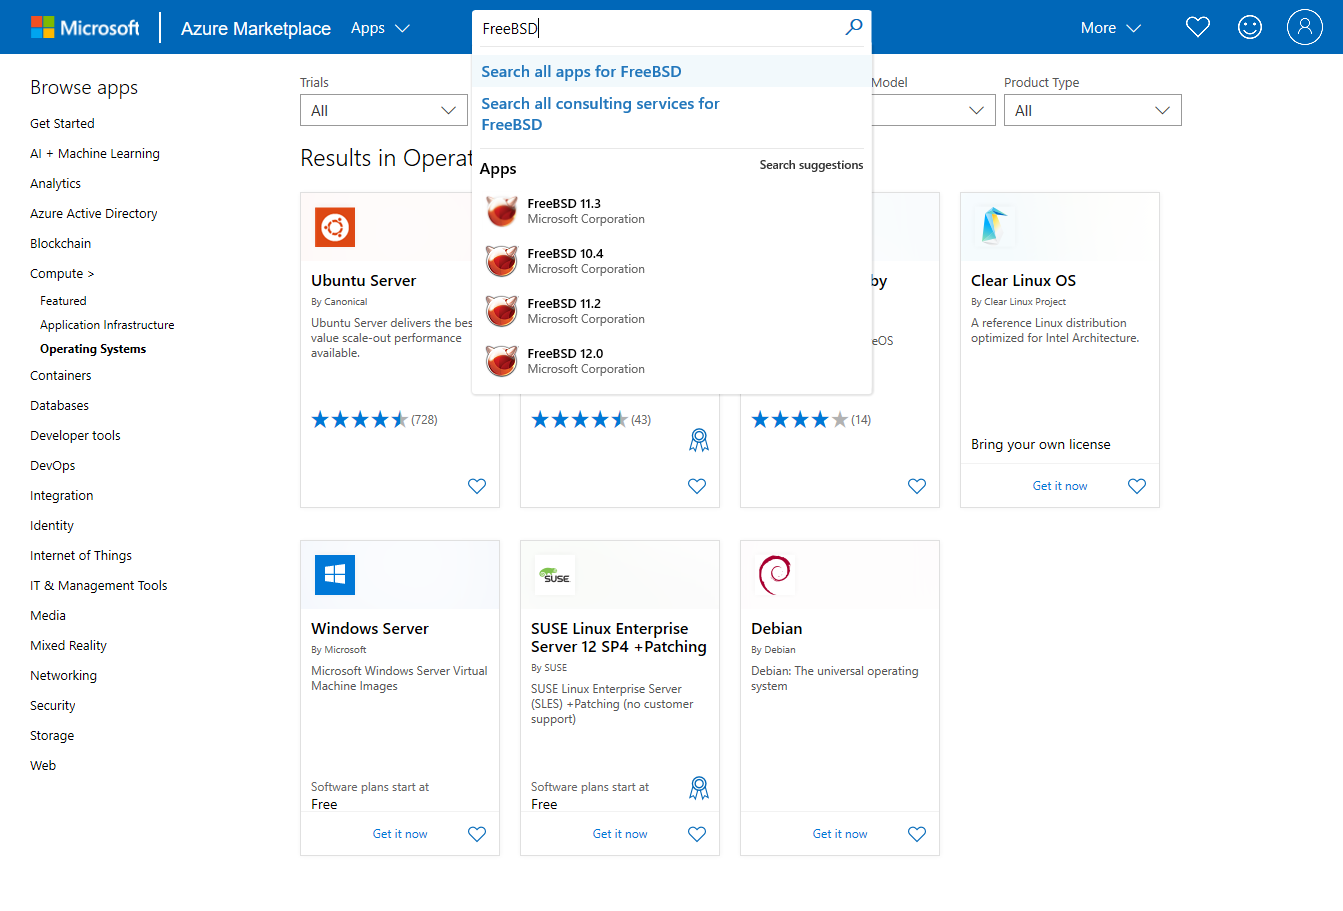
BSD/Linux on Azure Marketplace
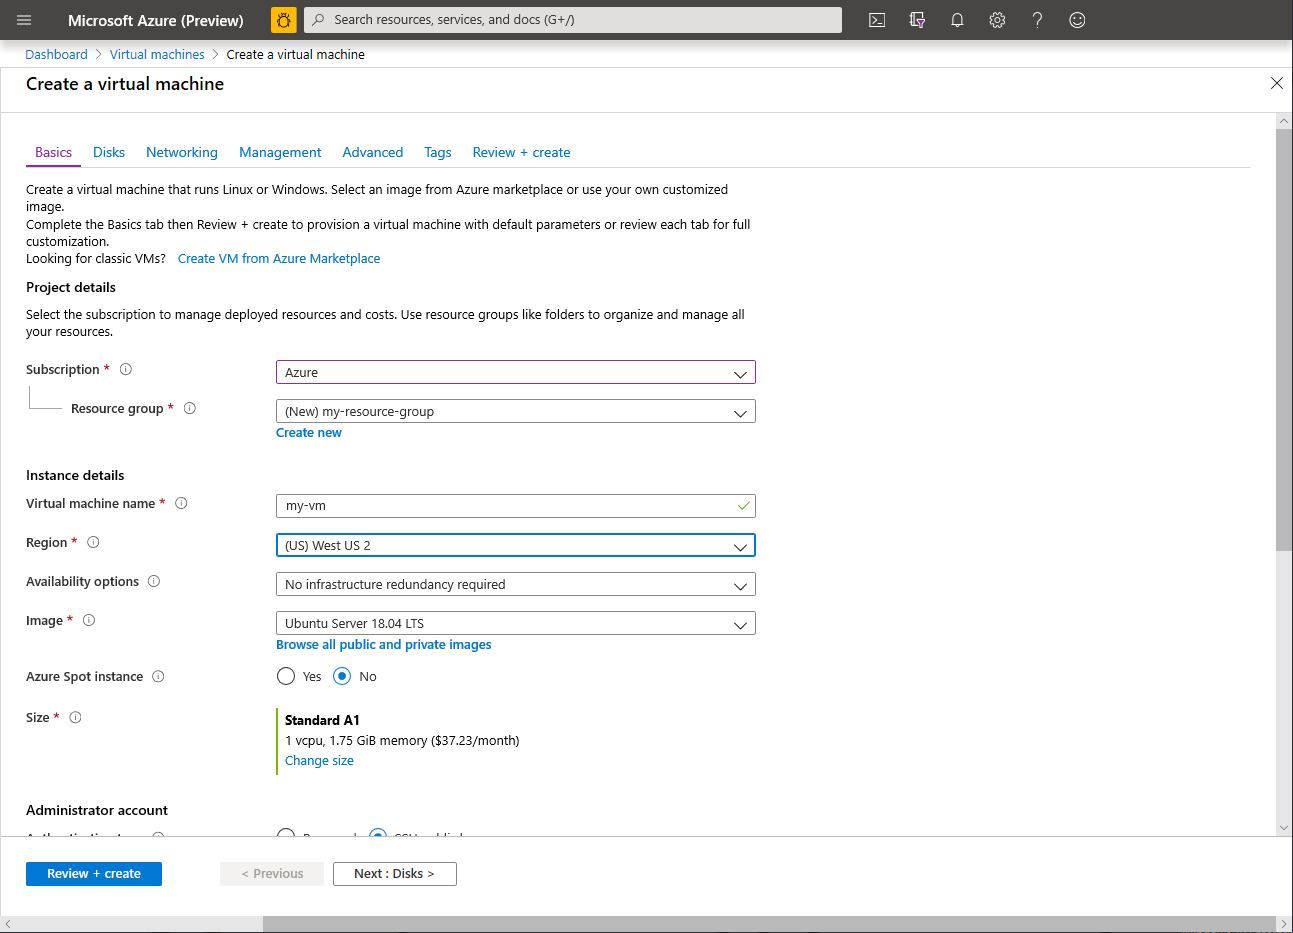
Moving to the Cloud, By Hand
- Manually log into portal
- Manually create new VM, new username/password
- Manually configure new VM
Moving to the Cloud, By Hand
Moving to the Cloud, By Hand

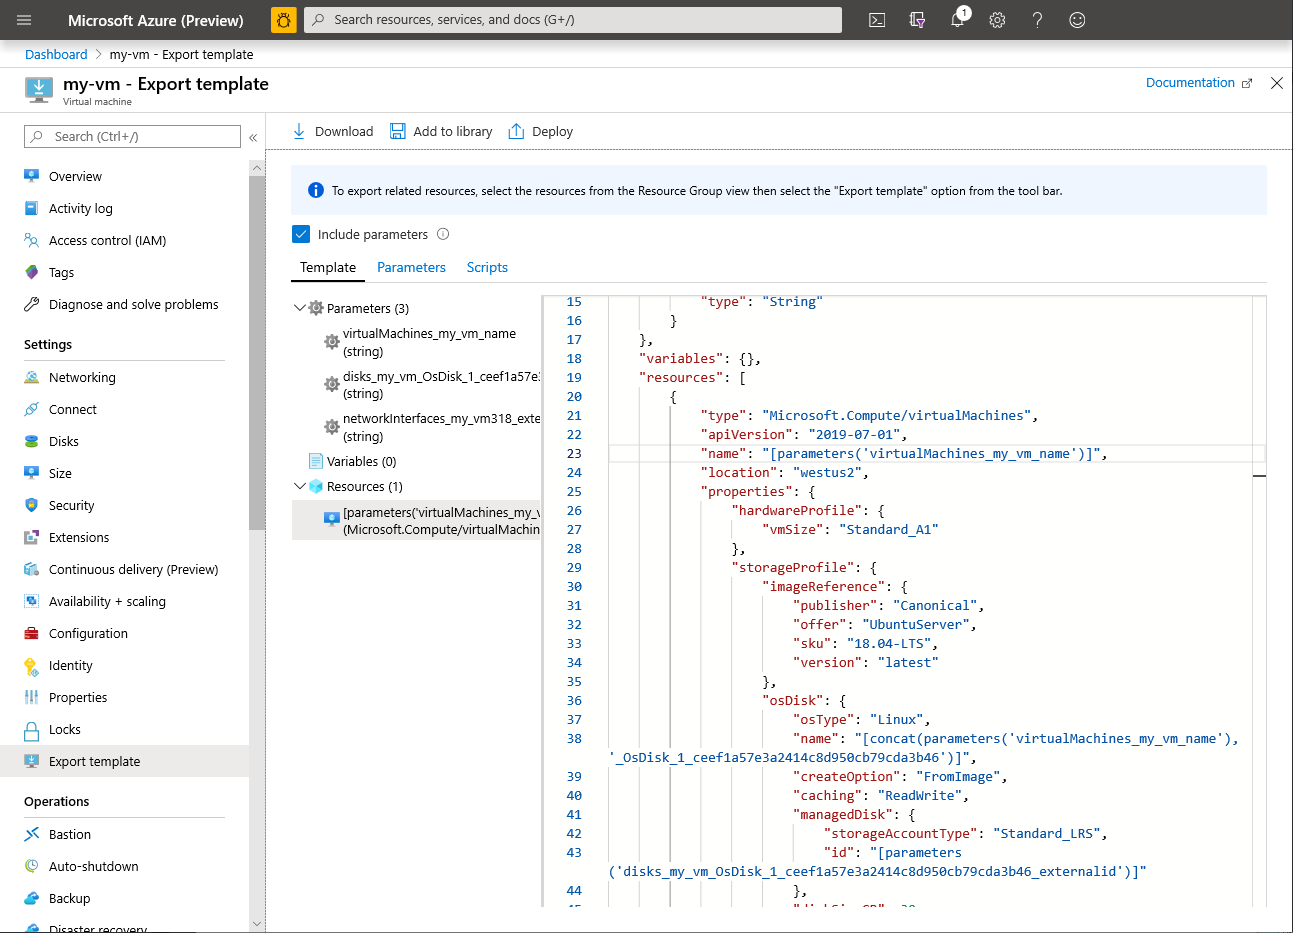
Post-Deployment Template
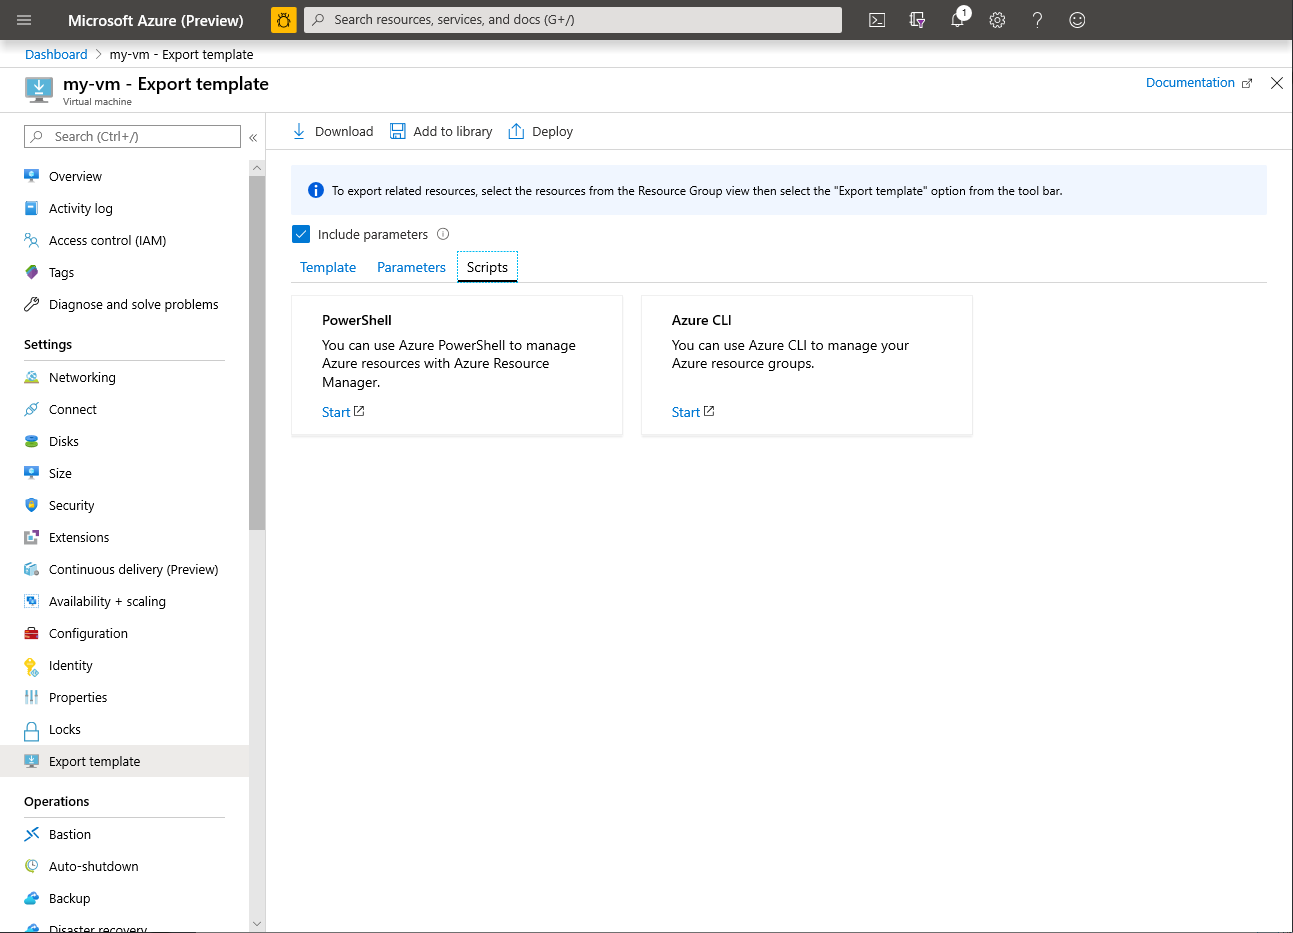
Deployment "Scripts"
Azure PowerShell (Don't do this.)
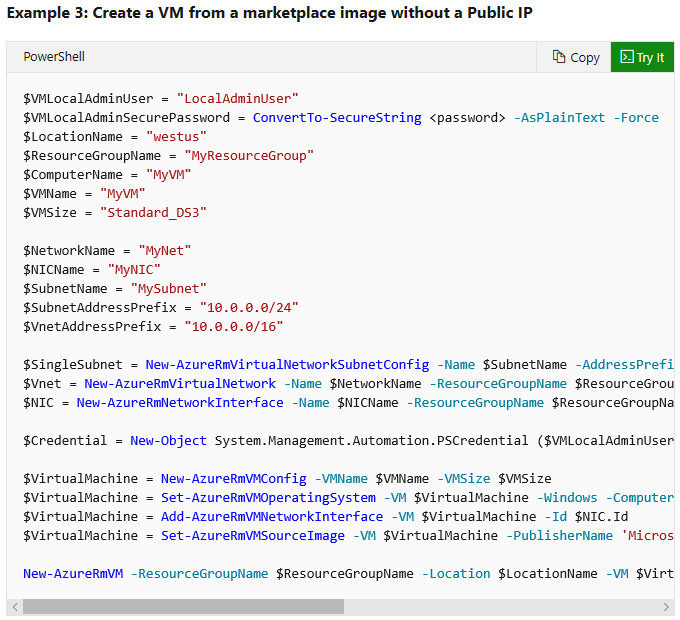
Azure PowerShell (The Less Wrong Way)
# splatting is good

$deployment_properties = @{

  'ResourceGroupName' = 'my-resource-group';

  'TemplateFile'      = 'C:\Path\to\template.json';

  'Verbose'           = $True;

}

New-AzureRmResourceGroupDeployment @deployment_properties
(Don't do this, either. The deployment, not the splatting.)
Problem Statement
- Cloud services offer compelling uptime for low cost (cap ex vs. op ex)
- Migrating existing services in situ is faster & safer than a total next-gen rewrite
- Diverse but insufficient marketplace, custom image still needed
- Customizing infrastructure is complex & error-prone, need to Automate All The Things
Moving to the Cloud, With Automation
Three main technologies (Microsoft, Red Hat/IBM, & a Canadian project) being excellent to each other:
 |
 |
|
Azure |
Ansible |
OpenBSD |
Why BSD? It's not the license
Why BSD? It's not the license
$ wc -w gplv2.txt

   2964 gplv2.txt


$ bc -le '100 * 2964 / 2964'

100.00000000000000000000
Why BSD? It's not the license
$ wc -w gplv2.txt

   2964 gplv2.txt


$ bc -le '100 * 2964 / 2964'

100.00000000000000000000


$ wc -w bsd4c.txt

    241 bsd4c.txt


$ bc -le '100 * 241 / 2964'

8.13090418353576248313
Why BSD? It's not the license
$ wc -w gplv2.txt

   2964 gplv2.txt


$ bc -le '100 * 2964 / 2964'

100.00000000000000000000


$ wc -w bsd4c.txt

    241 bsd4c.txt


$ bc -le '100 * 241 / 2964'

8.13090418353576248313


$ wc -w bsd2c.txt

    189 bsd2c.txt


$ bc -le '100 * 189 / 2964'

6.37651821862348178137
Why BSD? It's not the security
- OpenBSD Project started in 1996 as NetBSD fork
- "Only two remote holes in the default install, in a heck of a long time!"
- Last remote hole in OpenBSD: 2007
Why BSD? It's not the security
- OpenBSD Project started in 1996 as NetBSD fork
- "Only two remote holes in the default install, in a heck of a long time!"
- Last remote hole in OpenBSD: 2007
The #1 single on that day was "This Is Why I'm Hot" by Mims.
The #1 film at the box office was 300.
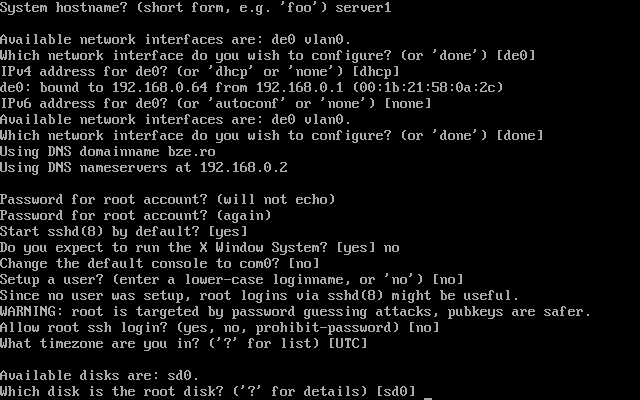
Why BSD? It's the installer
- OpenBSD installer can still fit on a floppy
- Default behavior is an interactive dialogue:
Question? [default value] <answer> - 2014: "The autoinstall(8) feature first appeared in OpenBSD 5.5."
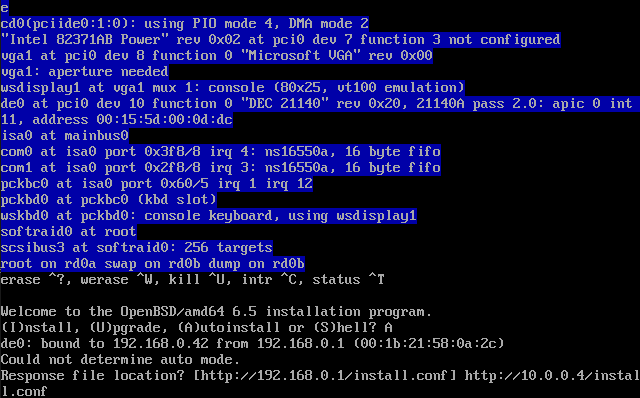
Why BSD? It's the installer
Why BSD? man autoinstall(8)
A typical install.conf file will look something like this:
System hostname = server1

Password for root = $2b$14$Z4xRMg8vDpgYH...GVot3ySoj8yby

Change the default console to com0 = yes

Which speed should com0 use = 19200

Setup a user = puffy

Password for user = *************

Public ssh key for user = ssh-ed25519 AAAAC3NzaC1...g3Aqre puffy@ai

...
Why BSD? man autoinstall(8) Part 2
Allow root ssh login = no

What timezone are you in = UTC

Which disk is the root disk = sd0

Use (W)hole disk MBR, whole disk (G)PT,

  (O)penBSD area or (E)dit = Whole

Use (A)uto layout, (E)dit auto layout, or

  create (C)ustom layout = Auto

Location of sets = http

HTTP Server = cdn.openbsd.org

Set name(s) = -x*.tgz
Automatic Disk Allocation: URL
URL to autopartitioning template for disklabel =

  http://192.168.0.1/disklabel.template

Location of sets = http

HTTP Server = cdn.openbsd.org

Set name(s) = -x*.tgz
Automatic Disk Allocation: Template
$ cat disklabel.template / 2G-* 80%
swap 64M
/var 150M-250M 20%
https://man.openbsd.org/disklabel
A basic OpenBSD autoinstall
- Put a web server on your intranet
- Host one or more disklabel templates
- Host one or more response files
- Host a local copy of the install sets (optional)
Network install similar to FAI https://fai-project.org
OpenBSD is the gold standard of OS installation automation. Only NixOS (nixos-generate-config --root /mnt; nixos-install) comes close.
A basic OpenBSD autoinstall
OpenBSD autoinstall: A better approach
- upobsd - build your own OpenBSD
bsd.rd ramdisk
- Install with
doas pkg_add upobsd
https://bitbucket.org/semarie/upobsd/
upobsd: Build file tree
mkdir -p ~/iso-dir/6.5/amd64
mkdir ~/iso-dir/etc
ftp http://10.0.0.4/install.conf
ftp http://cdn.openbsd.org/pub/OpenBSD/6.5/amd64/cdboot
ftp http://cdn.openbsd.org/pub/OpenBSD/6.5/amd64/cdbr
mv cdboot cdbr ~/iso-dir/6.5/amd64/
echo set image /6.5/amd64/bsd.rd > ~/iso-dir/etc/boot.conf
upobsd: Create custom bsd.rd
doas pkg_add upobsd
upobsd -v \
-m http://cdn.openbsd.org/pub/OpenBSD \
-V 6.5 \
-a amd64 \
-i ./install.conf \
-o ~/iso-dir/6.5/amd64/bsd.rd
upobsd: File tree
$ cd ~/iso-dir; find . -type f
./etc/boot.conf
./6.5/amd64/bsd.rd
./6.5/amd64/cdboot
./6.5/amd64/cdbr
upobsd: Create ISO
cd ~/iso-dir
mkhybrid -r \
-b 6.5/amd64/cdbr \
-c 6.5/amd64/boot.catalog \
-o /tmp/openbsd65-autoinstall.iso .
upobsd: Extra credit
- Include the install sets in 6.5/amd64/
- Embed a disklabel template into
bsd.rd
- Set disklabel URL to file:///<filename>
- Add a
site65.tgz with install.site script that runs eject cd0
These steps create a self-contained OpenBSD autoinstalling ISO with no network dependencies
Intro to Ansible
- Provisioning, configuration management, and deployment tool
- Similar to Chef, Puppet
- Agentless: no client software
- Requires target machines to run SSH server, have Python
Installing Ansible (The Wrong Way)
apt-get install ansiblepkg_add ansible
Packages are convenient, but you are at the mercy of OS package maintainers. Syntax changes & bugs between Ansible versions will make your playbooks fragile & non-interchangeable.
Plan your environment & playbooks today so they'll still work for you six months from now.
Install Ansible (The Right Way)
doas pkg_add:
bash
py3-jinja2
git
py3-setuptools
python-3.6.8p0
py3-yaml
(cd /usr/local/bin; test -f python || doas ln -s python3 python)
Install Ansible (Enable Unicode)
OpenBSD FAQ: "The text console's UTF-8 support is a work in progress"
cp -p ~/.profile ~/.profile.bak
echo export LC_CTYPE="en_US.UTF-8" >> ~/.profile
. ~/.profile
https://www.openbsd.org/faq/faq8.html
Install Ansible (Send in the Clones)
ANSIBLE_GIT_PATH=~/ansible.git
git clone github.com/ansible/ansible.git \
"${ANSIBLE_GIT_PATH}"
cd "${ANSIBLE_GIT_PATH}"
git checkout stable-2.9
bash
bash-5.0$ source hacking/env-setup
Ansible: Basic commands
bash-5.0$ ansible --inventory ./hosts --module-name ping group_name
bash-5.0$ ansible-playbook -i ./hosts ./upobsd.yml
Ansible: Inventory syntax
[group_name]
10.0.0.9
[group_name:vars]
ansible_become_method=doas
ansible_python_interpreter=/usr/local/bin/python
ansible_user=ansibleuser
ansible_port=22
ansible_ssh_private_key_file=~/.ssh/id_ed25519.ansible
Ansible: Playbook syntax
---
- hosts: <group_name>
vars:
my_variable1: 'Hello world!'
my_variable2: 1234
tasks:
- name: <task description goes here>
<module_name>:
<argument1>: <value1>
<argument2>: "{{my_variable2}}"
Create ISO with upobsd.yml (Abridged)
---
- hosts: openbsd
vars:
openbsd_hostname: server1
network_interface: de0
openbsd_root_password_hash: $2b$14$Z4xRMg8vDpgYH...
tasks:
- name: install packages (OpenBSD pkg_add)
become: yes
openbsd_pkg:
name: ['rsync--', 'upobsd']
Create ISO with upobsd.yml (Abridged)
- name: rsync
shell: rsync -qrtW --include=SHA256* --include=[bcm]*.tgz \
--include=bsd --include=bsd.mp --include=cdboot \
--include=cdbr --include=INSTALL.amd64 \
--exclude=* \
rsync://mirror.leaseweb.com/openbsd/6.5/amd64/ \
iso-dir/6.5/amd64/
Templates: conf65.j2
System hostname = {{openbsd_hostname}}
Which network interface do you wish to configure = {{network_interface}}
IPv4 address for {{network_interface}} = dhcp
IPv6 address for {{network_interface}} = none
Which network interface do you wish to configure = done
Password for root = {{openbsd_root_password_hash}}
Public ssh key for root account = none
Start sshd(8) by default = yes
...
Templates: site65.j2
#!/bin/sh
echo permit nopass {{openbsd_remote_user}} as root > /etc/doas.conf
echo export LC_CTYPE=en_US.UTF-8 >> ~{{openbsd_remote_user}}/.profile
pkg_add python-3.6.8p0
eject cd0
Create ISO with upobsd.yml (Abridged)
- name: add templates
template:
src: "{{item.name}}"
dest: "iso-dir/{{item.dest}}"
mode: "{{item.mode}}"
loop:
- {mode: "0755", name: "site65.j2", dest: "install.site"}
- {mode: "0644", name: "conf65.j2", dest: "install.conf"}
Create ISO with upobsd.yml (Abridged)
- name: tar install.site into site65.tgz
shell: tar cf - install.site | gzip -9 > 6.5/amd64/site65.tgz
args:
chdir: iso-dir/
warn: false
Create ISO with upobsd.yml (Abridged)
- name: run upobsd
shell: /usr/local/bin/upobsd -m http://cdn.openbsd.org/pub/OpenBSD -V 6.5 -a amd64 -p iso-dir/6.5/openbsd-65-base.pub -i iso-dir/install.conf -o iso-dir/6.5/amd64/bsd.rd
- name: make ISO
shell: /usr/sbin/mkhybrid -quiet -r -b 6.5/amd64/cdbr -c 6.5/amd64/boot.catalog -o /tmp/openbsd65-autoinstall.iso .
args:
chdir: iso-dir
Caveats
- Every release of OpenBSD works a little differently
- Packaged software versions will change between releases
- Keep separate
install.conf & install.site templates
upobsd: Extra extra credit
upobsd script doesn't support adding custom files, so:
- Patch
upobsd or use elfrdsetroot directly
- Edit
bsd.rd to add disklabel template
- Edit
install.sub OpenBSD install script (Be careful!)
Example: http://su.bze.ro/software/upobsd.html
http://su.bze.ro/software/upobsd.html
PowerShell: Create VHD
$vhd_file_name = 'openbsd65.vhd'
$vhd_properties = @{
'Path' = "C:\Path\to\{1}" -f ($vhd_file_name);
'SizeBytes' = 8 * [Math]::Pow(2,30);
'Fixed' = $True;
}; New-VHD @vhd_properties
PowerShell: Create VM
$vm_create_properties = @{
'Name' = 'openbsd';
'MemoryStartupBytes' = 4 * [Math]::Pow(2,30);
'Generation' = 1;
'VHDPath' = $vhd_properties.Path;
}; $vm = New-VM @vm_create_properties
PowerShell: Attach the ISO & Start
$dvd_properties = @{
'VMDvdDrive' = (Get-VM -Id $vm.VMId | Get-VMDvdDrive);
'Path' = 'C:\path\to\openbsd65-autoinstall.iso';
'Confirm' = $False;
}; Set-VMDvdDrive @dvd_properties
Start-VM -VM $vm
Ansible + Windows: Extra credit
- Ansible can manage Windows machines, too
- More complicated than
winrm quickconfig
https://docs.ansible.com/ansible/latest/user_guide/windows_winrm.html
Putting OpenBSD in the Cloud
- Microsoft published official documentation on this in 2017
- It's wrong
- Even if you work around the syntax errors, it uses WALinuxAgent
- WALinuxAgent has a dependency on OpenSSL
https://docs.microsoft.com/en-us/azure/virtual-machines/linux/create-upload-openbsd
Putting OpenBSD in the Cloud (The Right Way)
Reyk Flöter developed "cloud-agent":
- Designed specifically for OpenBSD
- Lightweight, uses LibreSSL
- Available as package as of 6.6:
doas pkg_add cloud-agent
https://github.com/reyk/cloud-agent
Putting OpenBSD in the Cloud (The Right Way)
Need two file changes before you upload your VHD to Azure:
$ cat /etc/hostname.hvn0
dhcp
!/usr/local/libexec/cloud-agent "$if"
$ cat /etc/boot.conf
stty com0 115200
set tty com0
https://github.com/reyk/cloud-agent
Ansible + Azure
- Ansible supports numerous cloud modules: https://docs.ansible.com
- Multiple cloud platforms provided: AWS, Azure, Google, Digital Ocean, among others
Install Azure CLI and Ansible Azure Modules
doas pkg_add py3-pip
/usr/local/bin/pip3.6 install pipenv
mkdir ~/azuremodules; (cd ~/azuremodules; pipenv install 'ansible[azure]')
mkdir ~/cli-azure; (cd ~/cli-azure; pipenv install --pre azure-cli)
Don't install these modules by hand. Use an Ansible playbook!
Authenticate with Azure CLI
Create a unique token that you can use to authenticate with Azure from a browser:
cd ~/cli-azure
pipenv run az login --use-device-code
Set Azure subscription ID:
pipenv run az account set --subscription 49f575c7-bdad-4e13-98ff-b546adf5d0b1
Invoking Ansible + Azure
cd ~/ansible.git
bash
bash-5.0$ source hacking/env-setup
bash-5.0$ cd ~/azuremodules
bash-5.0$ pipenv shell
(azuremodules) bash-5.0$
Deploy to Azure with Ansible
---
- hosts: localhost
gather_facts: no
vars:
image_name: openbsd65-YYYYMMDD
vhd_name: openbsd65.vhd
vhd_url: https://library.blob.core.windows.net/vhds/{{vhd_name}}
Deploy to Azure with Ansible
tasks:
- name: create new image
azure_rm_image:
name: "{{image_name}}"
resource_group: mygroup
location: westus2
source: "{{vhd_url}}"
os_type: Linux
Deploy to Azure with Ansible
- name: create VM
azure_rm_virtualmachine:
name: my-vm
resource_group: mygroup
location: westus2
vm_size: Standard_A1
admin_username: adminusername
admin_password: PASSWORD_GOES_HERE
os_type: Linux
image: "{{image_name}}"
The secret to keeping your doas file safe
doas chflags uchg /etc/doas.conf
This keeps Azure -- and everything else from changing your superuser permissions
Most Azure modules are self-explanatory
- azure_rm_image
- azure_rm_publicipaddress
- azure_rm_storageaccount
- azure_rm_virtualmachine
- azure_rm_something_info
- azure_rm_resource
Automate All the Things: a Review
- Automate the creation of installation media
- Automate the creation of a base VM
- Automate the customization that VM
- Automate cloud deployment of that VM
- Automate management of cloud images and VMs
In Conclusion
- Azure just needs a VHD with cloud-agent configured
- Ansible manages multiple domains with consistent syntax
- OpenBSD's autoinstall mechanism is simple but versatile
Remember:
Slides available online